Tuesday, June 21, 2011

I'm BACK!

Whew!  What an adventure!  My sister is very organized and loves to keep lists, but there's one very important part of keeping a list and having help - SHARE THE LIST!!!

The wedding was beautiful!  But there was more to it than just the wedding.  My sister prepared for everything.  When I say everything, I mean EVERYTHING!

I arrived on Tuesday evening.  We went to eat and then back to the house.  That was THE rest period for the trip!!

Wednesday, we got more stuff together,  Avery swam twice.  Of course she had to wear BOTH bathing suits!

We had dinner with the Groom's cousin (Best Man).  It's a fading memory that's for sure.


Finished the guests baskets.


These are the scones my sister made for the guest baskets.  She also made jam to put in there as well!


Thursday - guests baskets delivered to hotels, the rest of the groomsmen came to town from New Hampshire - took them to dinner.  This is a place called "5 Guys".  Good hamburgers and fries!!  Boxes and boxes of peanuts to eat while you wait for your food!.  In the picture is Patrick - the groom - on the right and Josh - best man and his cousin - on the left.  Would you believe Josh lives about 10 miles from me?


Friday - Bridal Luncheon.  Bridesmaids received their gifts. 


 Delicious food.  Salad on left and a chicken stuffed with cheese, mashed potatoes and I don't remember what else.

Yarrick (I don't know if that's spelled correctly) our server!!

All of us!


  Next up was manicures and pedicures.  This is my daughter Avery.  She went with the girls - without me.  


Avery on the left, my niece Molly on the right.


                                             This was the time set aside for the parents of the bride and the bride and groom to exchange wedding gifts.


 Prepare for the rehearsal dinner.

Shanna and Patrick making mean faces at each other.  Okay - that's not really helping here. 
Josh on the right cleaning up the garage and driveway! 

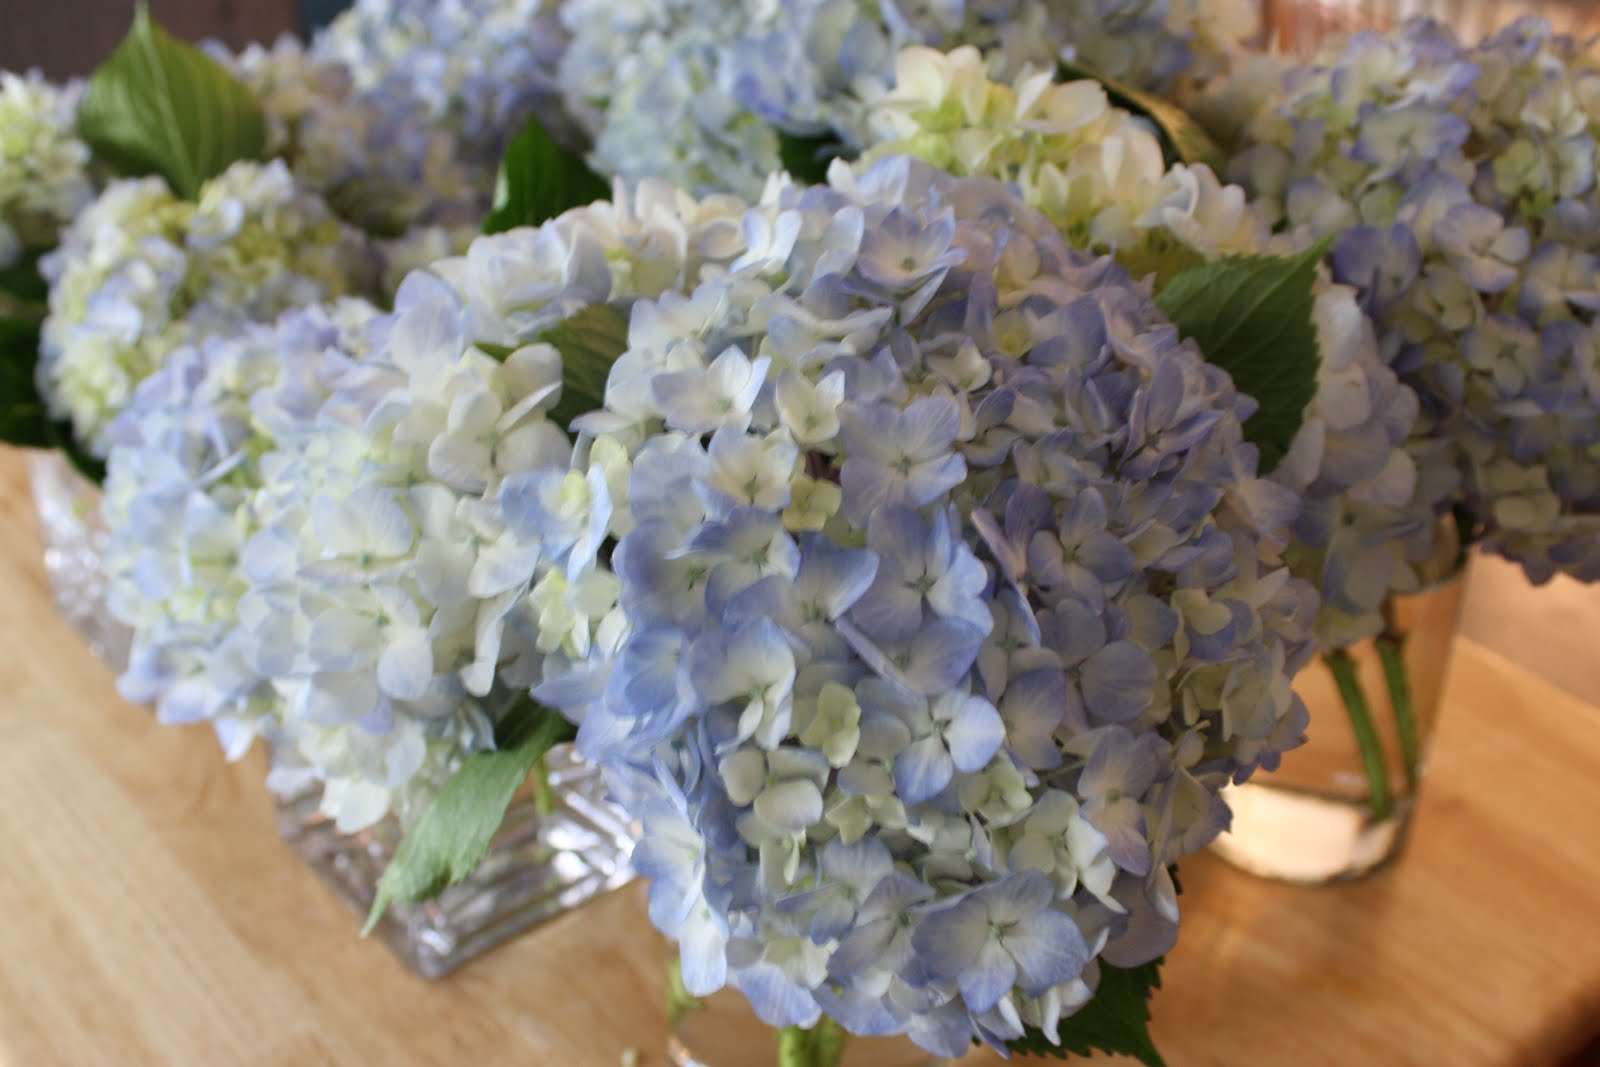
The center pieces for the rehearsal dinner.


 On the left are the hot dog baskets.  My sister finally confided that she bought them because she really wanted them and used the wedding as an excuse to buy them!!
On the right are the Chinese lanterns that needs to be hung!

 Decorating the tent for rehearsal dinner.

On the left is my brother and sister.

On the right is my sister-in-law (brother's wife) and my sister's best friend.


Before people started to arrive!


 Rehearsal!

Patrick holding his niece (flower girl) standing next to the bride's dad!

 My daughter Avery on the left.

Patrick

 Bride and her father!

Shanna and Patrick

Rehearsal Dinner!!
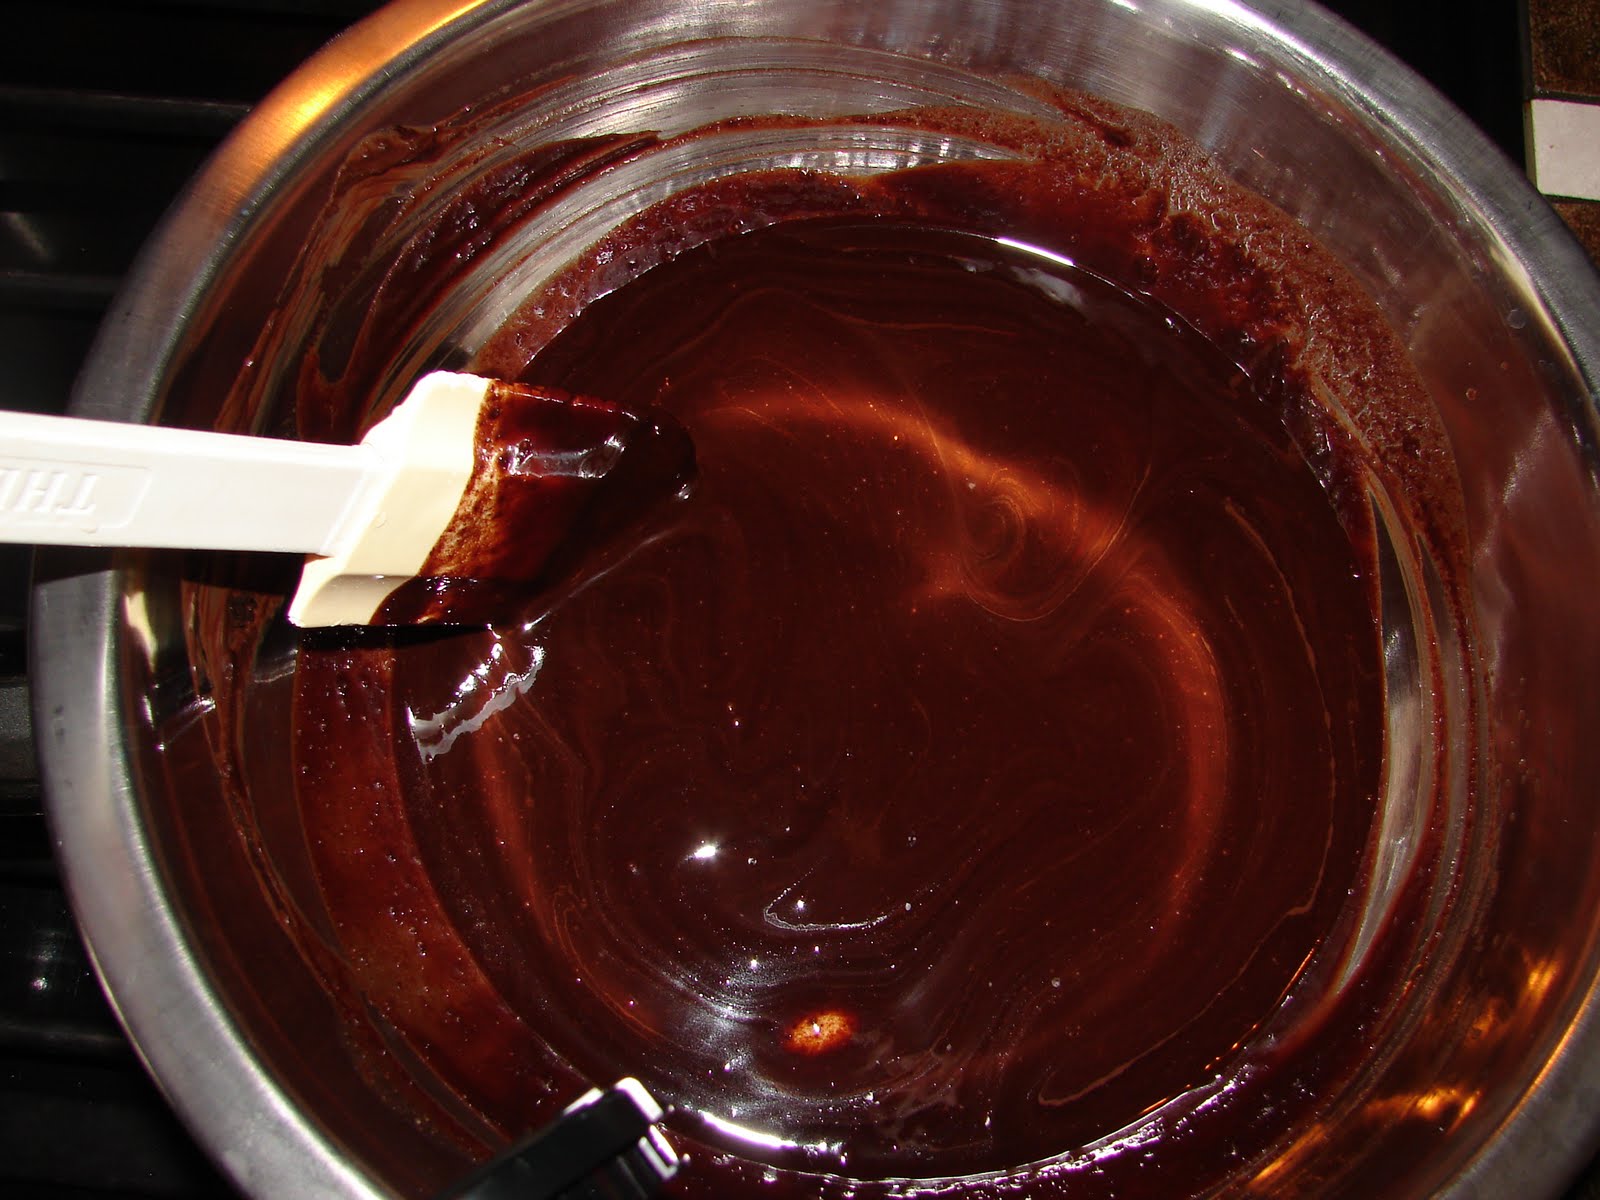
 My sister-in-law made all the desserts except the cupcakes.  No, I didn't make the cupcakes.  
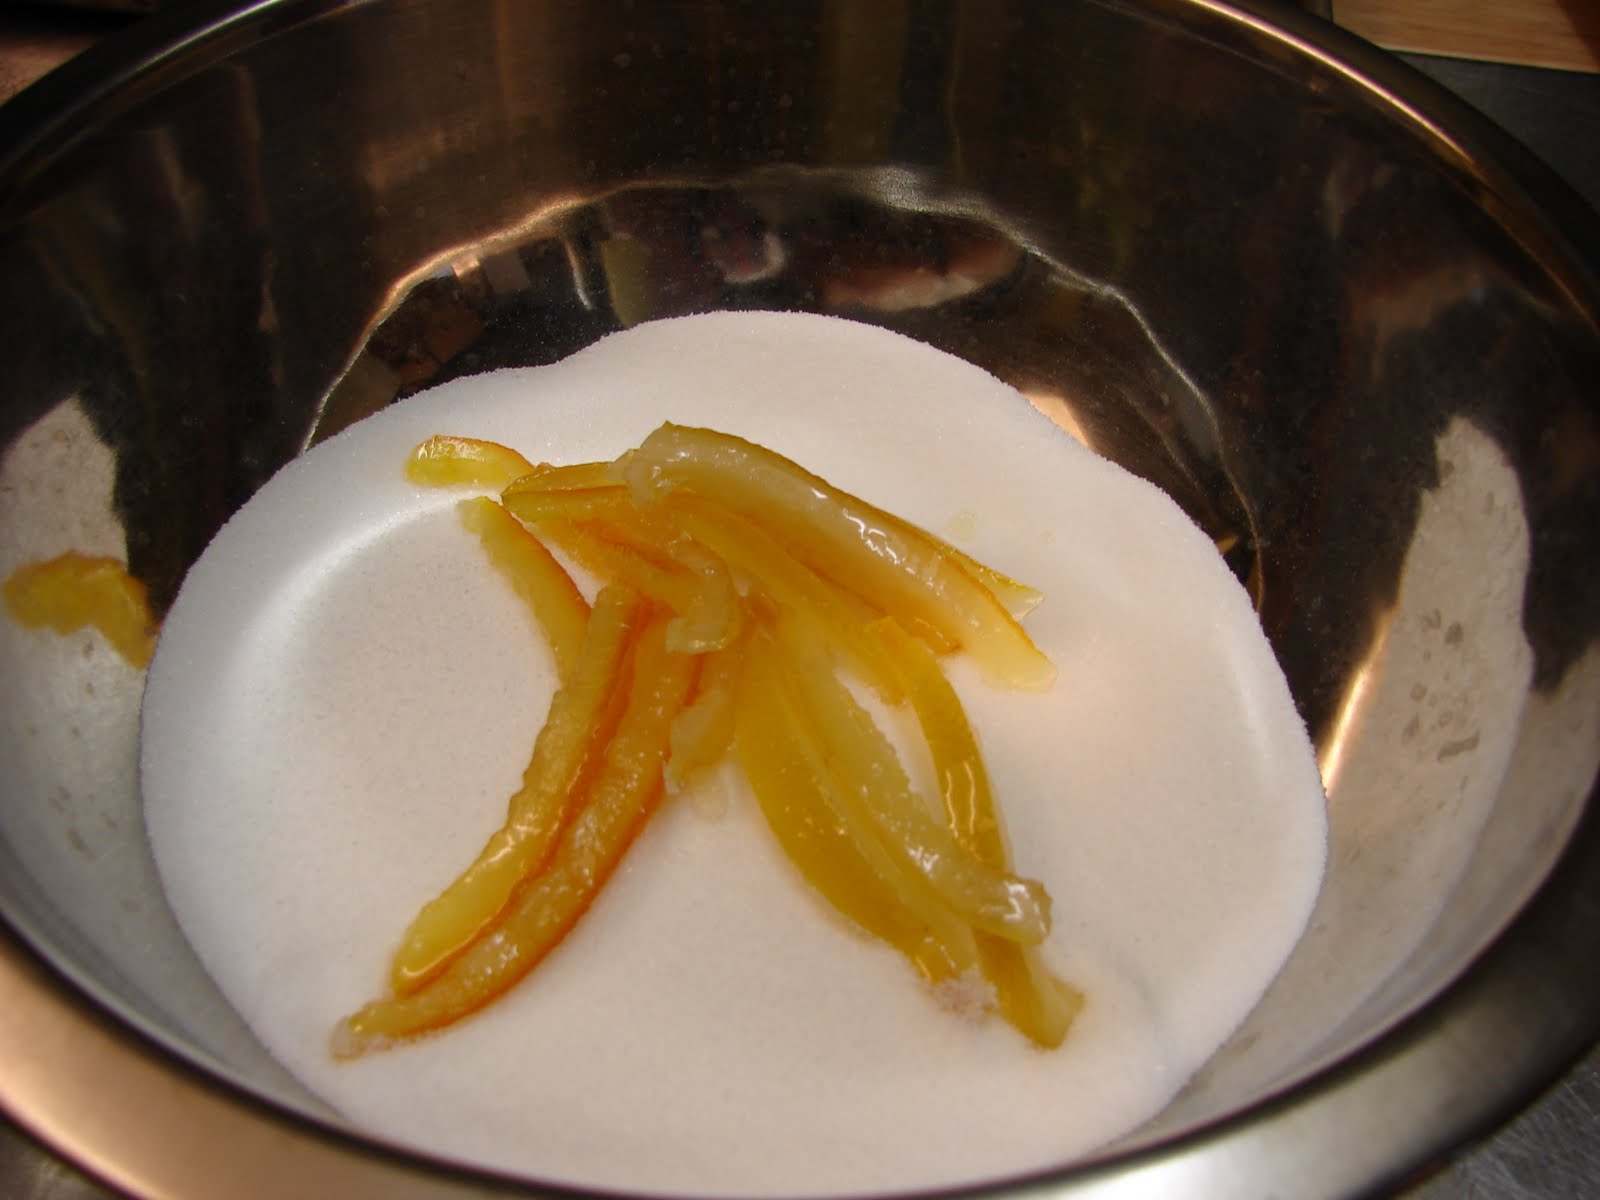
I did make the orange and lemon peels!


 This Kayla, although she kept saying her name was Dahlia or something.  No one could understand her except her mom.  This is Patrick's niece - flower girl. She was SOOO cute.


This 'happy' couple is my brother and his wife.  I can say this because they won't look at my blog.  Doesn't this picture describe their relationship?  Oh, let me tell you....sometimes people just need to agree that not every match is made in Heaven.  This one is near the top of that list!  All evening long and the whole reception this was their position.  I really like my sister-in-law, not my brother.
Practice for the bow ties!!
My sister and Josh!


 My daughter Avery and niece Molly catching fire flies!!
Thank you Molly for helping Avery with that!

Saturday - hair, make-up (3 hours later) pouring down rain! 


 Nadine (although her husband and everyone else pronounces it - Naaayy Deeean)  she is also the mother of the ring bearer.

On the right is Lauren.

Molly on the left and Katey on the right.

Get them to the church - late, driving every one's cars so they don't get wet, getting dressed,


I love this picture of Shanna!  She saw me taking the picture and didn't duck in the bathroom!  Instead she made the face - joking around!!  She's a character alright!!

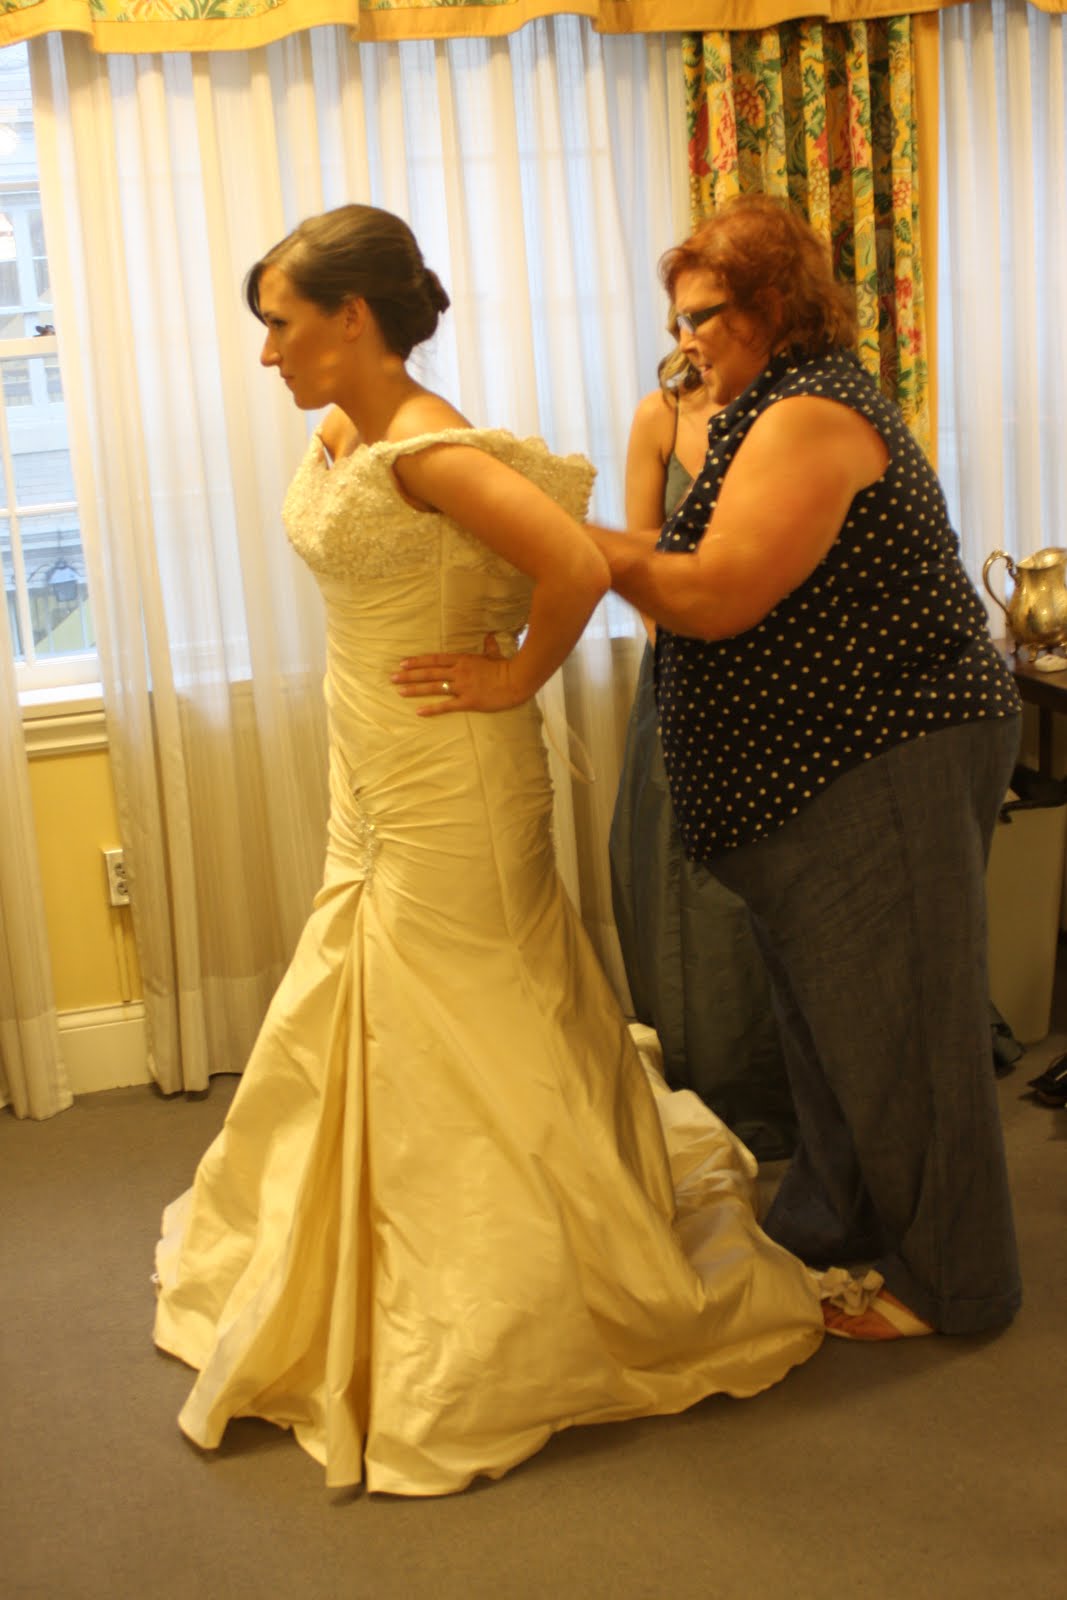
My sister helping the bride get dressed!

Her husband helping the groom to get dressed!!  lol

 My daughter.
My niece Molly.


I love this dress!  The details are beautiful!

The groom!  Isn't he a cutie?

 Finally - the wedding.


The worst part about all of this - I can't remember everything we did.  But we did a LOT!  It doesn't really seem like a lot when I write it out like this but let me tell you....it was busy.  It rained two days when we were there.  Saturday and Thursday I think.  Maybe Wednesday.  However, the rain stopped during the wedding so when they left the church it was mostly dried up outside!!

We had a wonderful time.  Avery had some difficulties walking down the aisle and she was freaking out not wanting to be in the wedding because of it.  Something happened from the rehearsal to the wedding that she agreed, stood in front of the front pew instead of walking down the aisle so she could just step up to her position.  Then she returned to the front pew instead of walking down the aisle.  She did a fantastic job despite being scared out of her wits!

My sister did a wonderful job organizing the wedding.  She worked on this for a year and while her nerves were frayed she did an amazing job.  She gave her daughter and son-in-law the best wedding experience that anyone could wish for.  Patrick is a truly sweet man, not to mention good looking and well built, but he loves and adores Shanna and her family.  As we all have a plate full of problems so does Patrick with his family, in particular his mother.  For the second time in Patrick's life she walked out on him at the rehearsal.  But this time he was welcomed warmly by my family.  My wish for Patrick is that he never again has the feeling of need for his mother and can finally be free of all those feelings to be accepted by her.  Patrick - my sister and her husband, her son love and cherish you.  Not because you married into the family but because of who you are as a person.  I'm proud you call me Aunt Louise.

OH and I forgot - here are some pictures from the photo booth that my sister had at the reception!!  (as I sit here blubbering...)


 Molly and Avery on the left.


Avery on the right.

The rest of the pictures are either Avery alone or with me!

Wednesday, June 15, 2011

Suggestions!

Well we got here safely and Avery is having fun meeting my family.  She has never met anyone on my side of the family.  This will definitely be a bit overwhelming for her.  She is a Junior Bridesmaid.

While we are having fun and preparing for the wedding I have a project for you.

I've been thinking - I want my blog to stand out from all the others out there.  I've read a lot of blogs lately and none have done what you want.  I want your suggestions on what to bake.  I'll research it, bake it and blog about it.  And I'll have people taste the final product.  (yes dear, you will be a taster!!)  But not just my husband and family.  I want your ideas to come to life. 

So.... while I'm gone I want you to think about different desserts you have had a relationship with.  Those that when you think of a place you remember the dessert, or a memory that included that one special treat that you would love to have again.  Or even an idea that you've had or just thought of. 

You can email me privately or put it as a comment.  My email is LionsHeartBakery@gmail.com.

I will take you on the journey of making the product.  Who knows, maybe I'll even mail you a sampling of the product or have you come over to taste it yourself!! 

Please, let your imaginations run wild!!  I'll be back on Monday June 20th. 

My sister will be posting her wedding preparations on her own blog if you are interested in her journey (for the past year) after the wedding.  Her blog is http://accomplishedwoman.blogspot.com/.  I will include pictures when I come back!!

Tuesday, June 14, 2011

Baking Pantry

I am leaving today, actually by the time this blog posts I will be on a plane to Tennessee for my niece's wedding.  She is getting married on Saturday June 18th. 
This is Shanna and Patrick.

So today I am sharing with you my baking pantry.  Really, its just a closet.

Unfortunately, that is not all of the stuff I have for baking.  I have another closet around the corner.  The point here is that while it looks disorganized, it isn't.

I had so many cookie cutters that I just had them in bags stored places.  Too many places actually.  I couldn't tell what I had and what I didn't have.  So an idea hit me.  I needed something to organize the cookie cutters, not use up a lot of space, functional, versatile and cheap.

The back of the pantry door was just wasted space.  So I made this. 
It runs the entire length of the door.  The top I sewed ribbons on which hold multiple cookie cutters, then I created pockets to hold more cutters.  The top portion of this holds my Christmas cookie cutters.  Then the lower rows holds, animals, flowers, Easter, Halloween, landmarks and Princess cutters.  The very top has four ribbons in a row that hold my silicone sheets. 

My pantry holds my Kitchen Aid, sugars and grains, (minus the 50 lb bag of flour, confectioner's sugar and granulated sugar that are in separate containers around the corner), the next shelf holds the chocolates, milks, extracts, peanut butter filling, salt, etc...  The next row holds the decorating sugars and extra cookie cutters that I actually ran out of space on my organizer, baking chocolate.  Then I have a bread maker and my cake decorating supplies.
Well it may not look that organized but I know where everything is.  I can't wait to be able to put this where I can see everything someday!!

Monday, June 13, 2011

Candied Orange Peels

I can't think of which show I saw these on to save my life!  They were talking to this woman who makes them in her Bed & Breakfast I think, or was it her cafe'?  I have no idea.  But I remember thinking, as I always do, I can do that!  Yes.  Yes I can.  I did. 

During that show I remember her saying that she soaks them over night, and she does it twice.  Well, when it came time to make these I couldn't remember what she did twice and what she did overnight.  I looked up recipes for Candied Orange Peels but couldn't find any that said to soak in the sugar syrup overnight or to boil them twice in the sugar syrup.  So.  I did both!! 

First, you take the peels off the citrus fruit. Orange, Lemon, Lime, even Grapefruit.  I did Orange, obviously and I wanted to try Lemons.


 The way I did it I quartered the fruit, then with my thumb I got underneath the fruit, inbetween the peel and the fruit.  When I have a chunk of the fruit free I pulled it off the peel.

Next I sliced the peels.


Placing them in a bowl.


You must blanche the peels several times to get the bitterness out.  I did that twice for the oranges and three times for the lemons.

Next you will place them in a sugar syrup.


Cooking until tender and transparent - approximately 40 minutes.  This is where I actually made the sugar syrup then left them in the pot overnight.  In the morning I boiled them until done.

After they were finished in the sugar syrup - I learned from the last time not to take them out too early because they will dry too fast to roll in the sugar.

Instead of transferring the orange peels to a rack I wanted to see what happens when I transfer them immediately into a bowl of sugar. Toss to coat with sugar.


Transfer to a rack to dry.


They look like french fries.

Melt the dark chocolate and put in a container that will be deep enough to coat half a peel.


Then start dipping!


My mother-in-law came over for dinner and was helping me dip some peels!!
Its the only way to get the action picture!!

Transfer to parchment paper to dry.  I tried drying on a rack but the chocolate gets stuck to the rack and it makes it hard to get the peels off the rack in one piece.

I
I'm taking extras to my sister, took some in to my hair salon and we ate some!  I keep forgetting to take pictures of the final product!!!

Yum!!  My mother-in-law went with me to Seattle to go to the Chef Shop where I get my salt and cocoa.  There was a bag of....Candied Orange Peels from France.  Well there was more than just one bag but you get the idea.  Anyway I asked how much they were.  For 7 ounces it was $11.99.  Hmmm maybe I should develop a french accent?  Oui?

Friday, June 3, 2011

Red Velvet Cupcakes

This potluck picnic we went to on Tuesday evening I made the Salted Caramel Brownies and Red Velvet Cupcakes.  I don't know if I mentioned that these people, for the most part, have already had my Salted Caramel Cupcakes so I wanted them to try something else.  So much to choose from. 

My husband loves my Red Velvet Cupcakes, and I've been told that I make the best Red Velvet Cupcakes ever! So why not?


What is Red Velvet cake exactly?  I once thought it was chocolate cake with red food coloring.  Other people think it is a yellow cake with red food coloring.  Actually, it is a specific recipe that calls for a hint of cocoa, an acid - like vinegar - that reacts with buttermilk.  This reaction caused the red pigments in the cocoa to be more pronounced which gave it the red coloring.  Now that we have dutch processed cocoa we still want the red color so we add it artificially. 


I use an ice cream scoop to measure the batter and place in the cupcake holders.  I love it!! 


After baking I remove from the cupcake pans and place on a cooling rack to await their cream cheese icing!

I no longer make cream cheese icing like I used to.  My husband couldn't taste the cream cheese as well so he had me add more cream cheese to the icing.  My thought was to thicken the icing by adding more powered sugar.  He thought it was too sweet and hid the cream cheese flavor.  So now when I make this I usually ask him to taste it, however today I was by myself.  (A truly glorious time!!!)  With his critiquing in mind I prepared this cream cheese icing and did not wait for him to come home before applying it to the cupcakes.


Its hard to take pictures and try to make the food look appealing.  So you can see the texture or the thickness of the icing.  Thick enough to stay, but not thick enough to hold a design.

I place the icing in a large pastry bag.  Because I can't put a design on the cupcakes with this icing I don't bother with a tip.


 I put a little swirl on the cupcakes.

I'm not sure what happened that caused me to swirl the icing around with my finger (clean of course) but I decided to do that to all of them.  They look cute!!  Then I sprinkled them with a very pale blue sugar sprinkle (in the first picture).


So we get to this barbecue and head to the table holding the food, when I see another serving platter of....Red Velvet Cupcakes!!  OMG!!!  So, what was I to do?  I placed mine down next to them, with my brownies in between, and walked away.  Would you believe my son came to the table with one of HERS?  The horror.  I told him, "go ahead, eat it!  You're walking home."  He had no idea he took one of the other ones.  Well, let's just say that I had a taste, he tasted it, my husband tasted it and my daughter tasted it.....and there was still a quarter of it left that no one ate!  Now THAT's a sign of a bad cupcake!!
Everyone loved the cupcakes and brownies.  Many people asked my husband if 'those' (pointing to mine) were he wife's cupcakes.  At least the word is getting out that my cupcakes are indeed delicious!!

Thursday, June 2, 2011

Sifters!

Even though I've been baking for more than 30 years it continually amazes me how much I learn.


Who would think sifters were that big a deal?  Do you remember these?


Imagine sifting a large amount of flour with this.  I remember using one of these for one cake, my hand would get tired real quick! 

When I went to go looking for a sifter I knew NOT to get one of these!!  But they were everywhere!!


I looked many places to find a sifter that I would like, but there really aren't that many kinds.  I found this one.

Yes, its dirty.  However, the screw on 3 cup holder, while I nice idea, is really impractical.  The only way to get flour level would be to tap the edge of this cup - thus causing you to undo everything you just did.  I don't use that part.  I also don't use the screw on fine screen either.  I love this sifter.  It's quick, easy and cranks very nicely.  Only one problem - it doesn't hold that much flour.  I have not found one larger in this type of sifter.  This one cost me approximately $15.  No bad.

My big problem with this one is - what do I do after I've sifted the flour and now I want to sift the confectioner's sugar?  These are hard to dry.  Solution - get another sifter.  I got this one - same principal as the red one.  Has a crank, its larger, has the screen, what more do I need?  And it cost less than $11. Unfortunately, you get what you pay for.  That is so true here.  I don't like this sifter.  The crank is stiff and odd as this may sound it is not as quick as the other.  I don't know why and I can't explain it.


You may be asking yourself "why is she sifting the confectioner's sugar?"  Because there are lumps in the sugar most of the time.  Sifting eliminates those lumps, therefore cutting in half the time it takes me to mix the icing. 

When I decorate - whether it's cookies or cakes - whether it's royal icing or buttercream icing - nothing ticks me off more than when a clump of sugar gets caught in the decorating tip that blocks the icing or causes it to blob out of the bag!!


Until I find a better sifter these are what I have right now.  I'm gonna look online right now!  I'll keep you posted!

Wednesday, June 1, 2011

Sweet and Salty Brownies

I think that's their 'official' name.  I prefer Salted Caramel Brownies.  We belong to "Border's Bucks" where you get discounts, coupons, etc... at Borders.  My husband and I both love books so this works out great.  Unfortunately he is of the mindset that because you have a coupon  you must use it.  Anyway, he had a great coupon (50% off) and was letting me use it.  Nice of him, wasn't it?  So I went looking for what I want to use it for.  My opinion is, a book to read I can get from the library, a cook book or a knitting book or some other resourceful book of that nature I should buy.  I looked and looked.  I found too many that I wanted.  I told my husband some of the books I wanted and unbeknownst to me he made a memo of this information for later use.  Christmas time came around and guess what I got?  This great book.
While looking through this book I decided I must make the Sweet and Salty Brownies. However because I already make my own caramel for the cupcakes I decided to use that caramel instead of making the caramel from their recipe. Now, I've made brownies before, but the box mix always tastes soooo good. Brownies are my husband's favorite treat! (Among many) This is the first made from scratch brownies that tasted better than the box.

My husband continually states that these brownies are the best that he has ever had.  Coming from him I take that as a huge compliment.  We have a picnic to go to and while I know everyone loves my Salted Caramel Cupcakes I wanted to bring something else as well.  I made these (as well as Red Velvet Cupcakes which will be posted at another time).

First you melt dark chocolate with butter.  Because I hate the clean up part, I put the chocolate and butter in the metal mixing bowl instead of another pot, over a pot of boiling water. 

 As the chocolate and butter are melting, in a separate bowl place flour, salt and cocoa, whisk together.  If I haven't told you before I'll state it now, quality ingredients are essential.  I bought this cocoa - dutch processed - Italian - delicious from a store in Seattle called Chef Shop, the same store that I buy the salt from.  They also have a website called ChefShop.com, shocking I know.  This cocoa really does add something wonderful to all my chocolate products!


After the chocolate and butter are melted together:


You are to whisk in white granulated sugar and brown sugar.
The picture below is after the sugars and after 3 eggs.


Next you whisk in two more eggs and the vanilla.

 The final step is to fold in the dry ingredients, careful not to over mix.

Your baking pan is to be a 9x13 glass pan, butter the sides and bottom, lining the bottom with parchment paper. I highly recommend following this step! Just trust me on that one.

 Spread half the brownie mixture in the pan, then spread the caramel sauce on - not allowing the caramel to touch the sides of the pan. 
 Pour/spread remaining brownie mix on top of the caramel sauce.


Bake


Voila  - goodness in a square!  You will LOVE these!  I highly recommend buying this book, if not for this recipe, plus so many more that are fabulous.  I just can't provide it here.